Rendering Carlton
House Rendering Carlton | Complete Exterior Projects
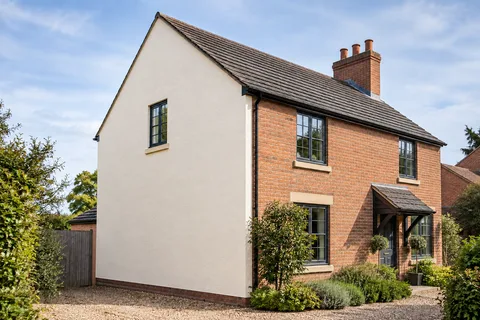
A house can look like one simple rendering job until you walk around it. The rear may have an extension, a side wall may retain an older coating, and a porch can leave a strip that is difficult to reach. House rendering in Carlton starts by identifying those differences. The aim is an exterior that looks intentional and has properly resolved connections between the parts, with a clear description of which surfaces are being changed.

On this page
Walk around the building, not just the frontage
Start with a photograph of each elevation and mark the proposed boundaries. Include the small return beside a bay, the strip above a garage roof and the face beneath an upstairs window. These areas are easily missed when a quote is based on the most attractive view of the house. Decide whether outbuildings, chimneys and garden walls are outside the project. They do not automatically belong in a whole-house price simply because they appear in a photograph.
The next distinction is between appearance and condition. A neat-looking rear wall may have a different background from a tired front elevation. Conversely, a surface with an unpopular colour may be sound enough to retain. Let those findings inform the scope. Where the intention is to renew everything for a consistent appearance, the quotation should still explain what preparation each elevation receives.
- Scaffold and protection Windows, doors, paths and planting are covered; downpipes, lights and satellite brackets come off.
- Old finish tested or removed Failed render is removed; the survey decides whether any sound areas can remain within the specified system.
- Masonry repairs and beads Cracked bricks and open joints are repaired; corner, stop and base beads are fixed.
- Base coats Sand-and-cement scratch and float coats, or a manufacturer basecoat with mesh.
- Finish coat A painted, scraped or thin-coat coloured finish, applied in suitable weather.
- Fittings and junctions Fittings are refixed through the new surface; sills, roofline and abutments are sealed.
The usual order of work. The survey and the chosen products decide the actual steps.
Choose where the new finish will stop
A change at a corner usually reads differently from a change in the middle of a flat wall. Existing features may provide useful boundaries: a brick plinth, an opening, a projecting bay or the return of an extension. Draw the proposed line before choosing the colour. Otherwise a later decision about retained brick can upset the amount of material ordered or leave an awkward strip below a sill.
Consider the neighbouring property where a frontage is attached. The render must have a suitable edge on the correct side of the boundary; a continuous appearance does not remove ownership or access questions. For a single face of a semi-detached building, the individual wall guide is useful alongside the complete-house brief. Agree who checks the boundary and who discusses any necessary access with the adjoining owner.
Identify layers that cannot be assessed from the street
Paint, patching and old render can conceal the original substrate. A survey may need limited opening-up or adhesion checks before the proposed system is settled. Any investigation should have a purpose: establishing whether a layer can stay, what the masonry is, or how a junction has been built. An indiscriminate promise to “mesh everything” does not explain those findings or establish that the background is suitable.
Where widespread defects are suspected, ask for a marked-up elevation showing retained and removed areas. That gives the owner a reference if the scope changes once access is available. The repair page explains how local failures can be described. A whole-house contract can contain substantial repairs without pretending that all elevations have identical problems or that a new topcoat will correct movement beneath it.

| Drawing or record | Decision it should settle |
|---|---|
| Elevation photographs | Faces, returns and outbuildings included |
| Retained-material plan | Brick, stone and existing finishes that stay |
| Interface schedule | Windows, roofline, pipes and boundary edges |
| Handover list | Inspections, reinstatement and product records |
Compare the appearance at full scale
A rendered exterior is seen as a collection of light and shadow. Recessed entrances, window surrounds and projecting bays can make one colour look quite different across the building. Use a physical sample in the intended position and view it at different times of day. A finish chosen indoors beside a screen may appear brighter, cooler or more textured when it covers the front wall.
Silicone finishes and monocouche render should be compared as complete proposed systems, including texture and maintenance. A traditional masonry building may instead need a lime specification. The decision should account for the wall and the retained materials as well as personal preference. Sand-and-cement can also be relevant in an appropriate specification; if decoration forms part of that choice, include it explicitly rather than assuming the initial render price includes painting.
Order the related jobs before the finish is applied
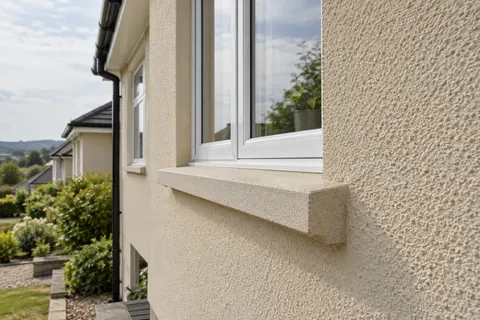
Exterior alterations often involve more than a renderer. Replacement windows, roof repairs, altered rainwater goods and relocated fittings can all affect the finished wall. Make a short schedule of dependencies. For example, a proposed sill may need to project beyond the final wall line, while a pipe bracket may need a different fixing arrangement after the background has been repaired or insulated.
If external insulation is being added, settle the build-up before ordering those components. If the work is render-only, that still does not justify burying unsuitable fixings or leaving penetrations unresolved. The specification should say who removes and reinstates fittings and whether competent specialist trades are needed. Give each task a responsible person so that no one assumes another contractor has allowed for it.
Access and protection are part of the house project
The scaffold arrangement needs to provide workable access to the actual faces being finished. Gardens, conservatories, boundary walls and differences in ground level can affect how that is achieved. Ask the access contractor to assess the site; a sketch from the owner is useful information, not a scaffold design. Protection should account for windows, paths, planting and the route used to carry removed material away.
For an occupied house, agree how the main entrance, bins and deliveries will be handled while work is under way. A practical arrangement reduces daily friction and avoids moving protection repeatedly. It is also worth deciding where materials can be stored without blocking inspection chambers or essential equipment. None of these points establishes a fixed duration, because the preparation and application conditions still govern the work.
Handover should explain the finished exterior
Walk around every included elevation before the final inspection is closed. Compare the result against the agreed scope, including low edges, corners, penetrations and the reinstatement of fittings. Ask for the product and colour references, any relevant maintenance instructions and photographs of details that are now difficult to see. A photograph of the front alone does not document the rest of the contract.
Keep the same elevation list for future maintenance. If a downpipe later leaks, it will be easier to describe the affected area and identify its finish. If you want a colour change several years later, the recolouring guide explains why the existing system matters. The Rendering Carlton homepage brings the different services together so that a later small repair can be considered without assuming the entire exterior needs to be replaced again.
Common questions
Does every elevation need the same preparation?
No. Different backgrounds and previous repairs can require different treatment even when the final colour is shared. The quotation should describe those variations so a uniform appearance does not conceal an assumption that every wall is equally sound.
Can the work be split into separate stages?
Phasing may be possible, but the stop positions, access and protection need planning. Decide what condition each stage will be left in and how the later finish will meet it. Do not assume separate batches will always be visually indistinguishable.
See housing and planning information for Carlton and nearby places, including the source and geography behind each figure.